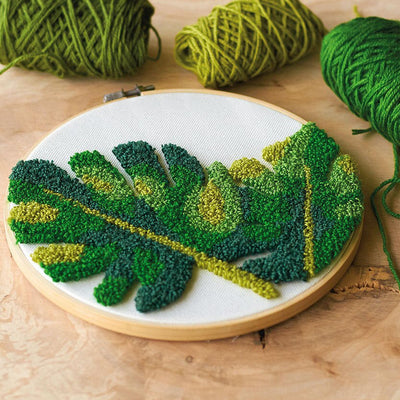
Monstera Leaves Punch Needle Tutorial

Learn the skill of punch needling with this super cute Dimensions Monstera Leaves Punch Needle craft kit.
Grab this craft kit Here (all materials you need for this project are in the kit) =>
This is a Home Made Luxe craft subscription box project, which means you can purchase this as a craft kit here! That's right no craft store nightmare trying to find all these materials just grab the craft kit.
Check out the easy steps below as well as the quick video tutorial for this super fun DIY Monstera Leaves Punch Needle Kit.
Materials Needed:
Home Made Luxe Monstera Leaves Punch Needle Craft Kit
or
- 8" Embroidery Hoop
- Leaf Printed Fabric
- Premeasured Wool Yarn in Assorted green Colors
- 2.2mm Adjustable Punch Needle
- Punch Needle Threader
- Scissors
DIY Monstera Leaves Punch Needle Video Tutorial:
DIY Monstera Leaves Punch Needle Tutorial
1) Unscrew the top of the hoop & place the inside hoop on the design, flip over so the design is on the back & add the outer ring. Adjust until the design can be seen in all areas.


More from:
punch needle

Leave a comment